A slightly different Loadouts post, there are many different variants of good squads for Murex Raids. This post will detail all the setups that I have had good success with. Granted, it is a bit late considering the Operation is going to end soon.
Overview
The Murex Raid is a two-part mission. The first part uses the Railjack to carry the Oplink Satellite to a designated location in front of a Murex. Once in place, the squad is to enter the Murex, plant their Oplinks in the designated location and defend them from Sentients, until all 9 Kill Codes are received and uploaded. Once this is done, the Murex will retreat, and the squad can proceed to the next Murex, for up to 5 Murexes in a single mission.
With a full squad of competent players and a consistent supply of Kill Codes (which is a big "if"), I have managed runs as short as 14 mins 30 seconds before. With absolute optimal play, I believe this could be shortened to within 14 mins.
Warframes
There are two main roles you should aim to fill: CC/Defence and DPS.
The CC/Defence Frame is responsible for protecting the Oplinks and
keeping them alive. As the only threat to them comes from Sentient enemies, and
there is no requirement to kill them, simply CC-ing them is sufficient
to complete the mission. Unfortunately Sentients are resistant or immune
to many abilities, so there is only a small subset of Frames that are
effective in this role.
The DPS Frame is responsible
firstly for killing any boarders on the Railjack, and secondly for
killing any Sentients that may be threatening the Oplinks. Again, as
Sentients are damn tough, resistant to many abilities and adapt to
damage types, there is only a small selection of Frames that can
effectively take them down at high levels.
CC/Defence
As always,
Limbo is the go-to defensive Frame. He is by far the best at defending stationary objectives, capable of putting them in another plane of existence entirely and completely stopping most enemies. He was so good in Scarlet Spear that DE introduced diminishing returns on his Stasis against Sentients - each subsequent application of Stasis will have a reduced effect on a given Sentient. This of course is not an issue if you are killing them at a reasonable speed, but prevents completely brainless play.
Because the Oplinks seem to be placed semi-randomly, I recommend having slightly increased Range, to ensure Cataclysm (4) will cover them all. Naturally, everything else is put into Duration for as long lasting Cataclysm + Stasis (2) as possible. I strongly recommend +Casting Speed, as Limbo's base casting speeds are quite slow.
An alternative that I've been quite enjoying is Octavia. Her Resonator (2) is one of relatively few CC abilities that works very well on Sentients in a wide area. Besides drawing their attention, a Resonator (
without an active Mallet [1]) will also stop affected Sentients from attacking, even when shot at. Additionally, it actively seeks out enemies who are not currently affected by it.
With this in mind,
do not cast Mallet (1). Mallet causes enemies to resume attacking, even under the effect of Resonator. Given how high Sentient damage output is at higher levels, this can be quite dangerous to both the Oplinks and players even when focused towards the Mallet.
Octavia's Metronome (3) and Amp (4) are still useful buffs, though less impactful without high Power Strength.
To maximise Resonator's effect, I build for maximum Range with high Duration. The goal is to neutralise all Sentients as quickly as possible, which is best done with Range. High Duration is helpful to minimise the number of recasts, as each recast introduces a very small window in which the Sentients may attack. Since Resonator can be recast and Energy is not an issue for Octavia, Efficiency is not necessary. Strength is completely ignored as Resonator is the primary ability here, but can be increased if you want to make Metronome and Amp more useful.
The third option I have experience with is Baruuk. Baruuk's Lull (2) is again one of relatively few abilities that can mass-disable Sentients reliably. Notably, it is also capable of cancelling Conculyst spin-attacks and Battalyst laser attacks. However, the effect will end if you damage affected enemies, making him the least-fun option in my opinion.
Elude (1) and Desolate Hands (3) both increase survivability and the former does not need Power Strength to be effective.
My Baruuk build maximises Duration, to minimise casting frequency. High Range is necessary to ensure that any Sentients who are within attacking range of the Oplinks are affected. Strength is not needed for Lull.
DPS
Mesa is the premier Sentient killer Frame. With Peacemaker (4), she has auto-targeting and unmatched damage output, and with Shatter Shield (3) she can be quite tough as well.
Power Strength is the way to go, more Strength means more damage. Efficiency and Duration where you can afford them are helpful for keeping Energy in check. Growing Power or Corrosive Projection are the main Auras to use. Arcane Velocity is extremely powerful on Mesa, as they proc constantly from her Regulators and boost their DPS significantly.
See the below Weapon section for discussion on setting up Mesa's Regulators, as they follow the same guidelines.
An alternative to Mesa is
Titania. Though her Razorwing (4) mode is nowhere near as powerful as Mesa's Peacemaker (4), I find Titania far more fun to use, and she has a few notable advantages over Mesa in Murex Raids. Unlike Mesa, Titania can target and destroy Aerolyst canisters as well as any Immunodes. Additionally, her Lantern (3) can be cast on Brachiolysts, and is a decent CC tool. Note that it cannot be cast on most other Sentients.

Again Power Strength is the focus, and Razorwing Blitz is an insanely strong and fun Augment. It is pretty much the only way Titania can get even remotely close to Mesa's damage output. Preserving some Duration and Range allows Lantern to be effective, provided you can find a Brachiolyst to cast it on. Again, Growing Power or Corrosive Projection are the go-to Auras. Arcane Precision is a massive damage boost for Titania's Dex Pixia, and very simple to trigger. Arcane Avenger is very strong when it procs, but requires getting damaged. Arcane Pistoleer would be a better alternative, as it temporarily removes ammo consumption on headshot kills, but I don't have it.
Again, refer below to the Weapons section on why I've built Titania's Dex Pixia this way. Diwata is basically useless, and not worth looking at or using.
Besides the advantage of auto-aiming, Mesa's Peacemaker is not restricted by ammo, where Titania's Dex Pixia can run out of ammo quickly, especially with Razorwing Blitz active and stacked up. This is Titania's biggest damage bottleneck.
I've also read of people having good success with
Baruuk's Serene Storm (4) with Reactive Storm against Sentients, but I don't like using him and don't have him set up properly so cannot personally confirm.
Extras
So long as you have the two aforementioned roles filled, the other two squad members can bring pretty much whatever Frames they want. Of course, it doesn't hurt to have a second CC or DPS for some extra assurance/redundancy. If you have multiple DPS Frames, have them build for different elements to maximise damage output against the Sentients. A support Frame like Wisp or a CC/Debuff like Nova certainly don't hurt.
Weapons
As Sentients are Status-immune, there is a simple goal here - go for Crit-heavy weapons, and your go-to element should be Corrosive as they are all Ferrite-armoured, with Robotic health. Make use of the Primed Elemental mods to add in extra damage types, to keep damage output up when the Sentients start adapting. In particular, make the Corrosive component slightly smaller than the other element, so that the Sentients adapt to the extra element first - Corrosive is by far the biggest damage dealer even when not the largest component and you want them to adapt to it as late as possible.
If you are relying solely on your own weapons to deal damage, consider varying your elemental setups. For instance, your primary might have Corrosive + Cold, and your secondary Radiation + Toxin or Viral + Electric. That way, when Sentients adapt to one weapon, your other weapons will still do good damage.
The other consideration to take into account is Aerolysts - a Sentient enemy who is invulnerable until their belt of canisters is destroyed. The best weapons for destroying these canisters are those with large direct hitboxes and Punch Through - explosives do not seem to work. Otherwise, Shotguns with high pellet count and Punch Through are reasonably effective as well.
Primary
Pretty much any Crit-heavy primary will do. Snipers, Kuva Bramma, Kuva Chakkhurr, Vaykor Hek, the list continues. My preferred weapon is the Kuva Hind, as I like how it handles and it still does good damage to Sentients. For Rifles, my recommended go-to combination is Corrosive + Cold, because of Primed Cryo Rounds.
The Shedu is worth a mention here. Though it is not particularly effective at damaging Sentients, emptying its small magazine will emit a 20m radial pulse that strips Sentient resistances. One squadmate with a Shedu built for maximum Fire Rate can be extremely helpful for your squad's overall killing power.
For Aerolyst canister destruction, Fulmin is the best primary that comes to mind. Its Semi-Auto deals great Crit damage, and its projectile is large enough to shred through most, if not all of the canisters at once.
Secondary
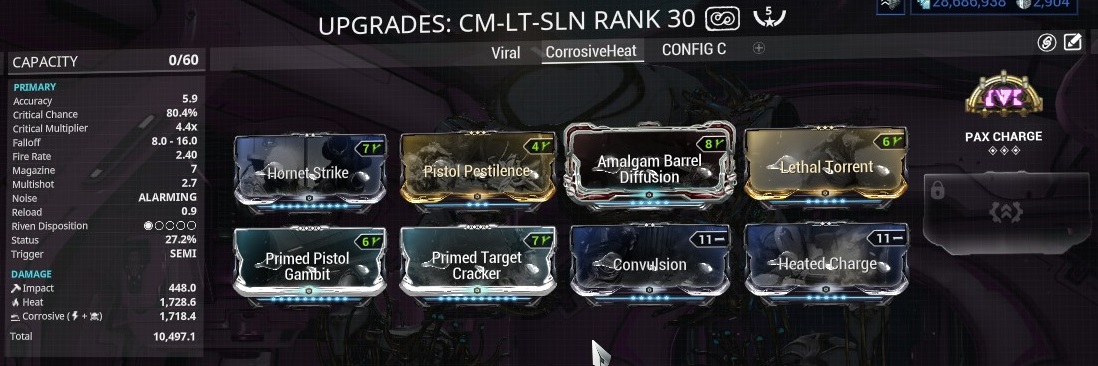
My secondary is a Catchmoon Kitgun, for popping Aerolyst canisters. The same general concepts otherwise apply - go for a high Crit weapon (e.g. Kuva Seer, Kuva Brakk, Pyrana Prime, Tombfinger Kitgun), build for Corrosive + Heat to make the most of Primed Heated Charge.
Melee
There is one clear winner here, the Paracesis. It is Crit-heavy, and when fully Forma'd it deals additional damage to Sentients and also strips their resistances. It is by far the best Melee weapon for killing high level Sentients.
If you do not yet have the Paracesis, then again aim for the most Crit-heavy melee you have, built for Corrosive. The Redeemer Prime is worth a mention, as its heavy attack is very powerful when built for Crit.
Focus School
I strongly recommend at least one squad member using the Vazarin school, in particular Protective Dash. It is one of the relatively few ways of healing Oplinks (and is really good at it), so is potentially mission-saving if your squad gets caught out.
Railjack
Though the Murex Raid is touted as a Railjack mission, there is actually not too much Railjack to it. All you need is to carry the Oplink Satellite from Murex to Murex, then park the Railjack within the Murex for safety, and the rest of the time is pretty much all spent on foot inside the Murex. As such, your Railjack only needs two main traits: speed and survivability.
Components
The most important component is to have as fast an Engine as possible. This image is of my current Engine, which has a very high base Engine Speed, but low Boost Speed. Vidar Engines appear to be the fastest overall Engines of the three houses.
Avionics
The main Avionics to focus on are again speed and survivability. Conic Nozzle and Ion Burn are your speed increasing ones, Bulkhead, Hull Weave and Maxima are all for survivability. You can also equip some of the damage type resisting Avionics for even better survivability, though I don't know which ones are best. There are some Battle Avionics that can be helpful, but I don't have enough knowledge in those.
Intrinsics
If you're piloting, you want minimum Piloting 5, ideally at least Piloting 7. Drifting is an enormous speed boost over regular boosting, and can cut several minutes off of run times when used properly.
Tactical 4 is always useful to be able to Omni back to the Railjack at any time, and Tactical 10 to teleport to other squad members from the Railjack can save a bit of time as well. In my regular squad, we have the fastest member (me) enter the Murex normally, while the others clear any boarders and fix problems. Then, once I've dropped my Oplink, the other squad members can teleport straight to me and drop their Oplinks. I also don't have Tactical 10 yet so I would have to make the trip regardless of who went first.


No comments:
Post a Comment